June 10, 2026
How I Turn One Product Photo Into a Shopify Asset Pipeline
A practical no-shoot workflow for turning one Shopify product photo into catalog shots, lifestyle placements, try-ons, and ad-ready visuals with Supra AI Photo Studio.
How I Turn One Product Photo Into a Shopify Asset Pipeline
I kept ending up with the same problem: one decent product photo was enough for the product page, but it died the moment I needed a lifestyle shot, a try-on variation, or a quick ad visual.
That is what pushed me into Supra AI Photo Studio and its landing page. I wanted to see if I could treat one source image as the start of a repeatable workflow instead of the end of the job.
What I got was a simple rule: clean the source once, then branch it into outputs that each solve a different ecommerce problem.
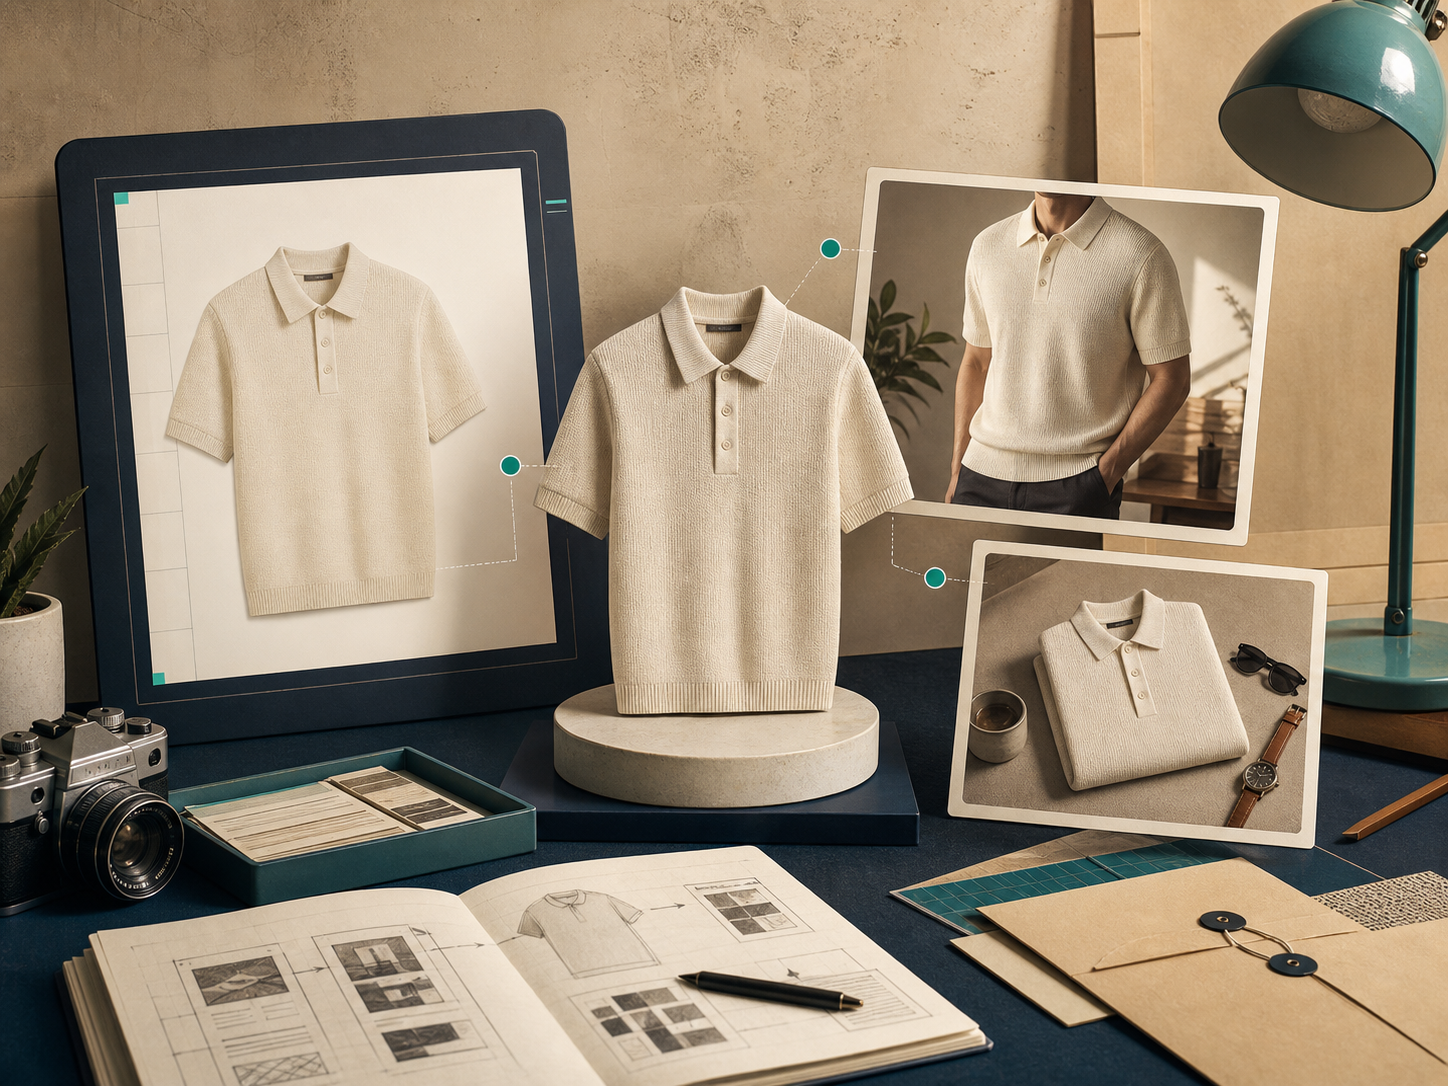
What I Want From One Source Photo
I do not need a miracle image. I need a usable starting point.
For a Shopify store, that usually means:
- a clean catalog image for the product page;
- a contextual version for lifestyle or collection pages;
- a try-on or mockup version when the product needs to be shown on a body or in context;
- a short b-roll or UGC-style clip for ads and social.
That branching point is the whole story. If I can get a reliable base image, I can produce more useful assets without restarting from scratch.
Start With Cleanup, Not Creativity
The part I used to skip was also the part that mattered most.
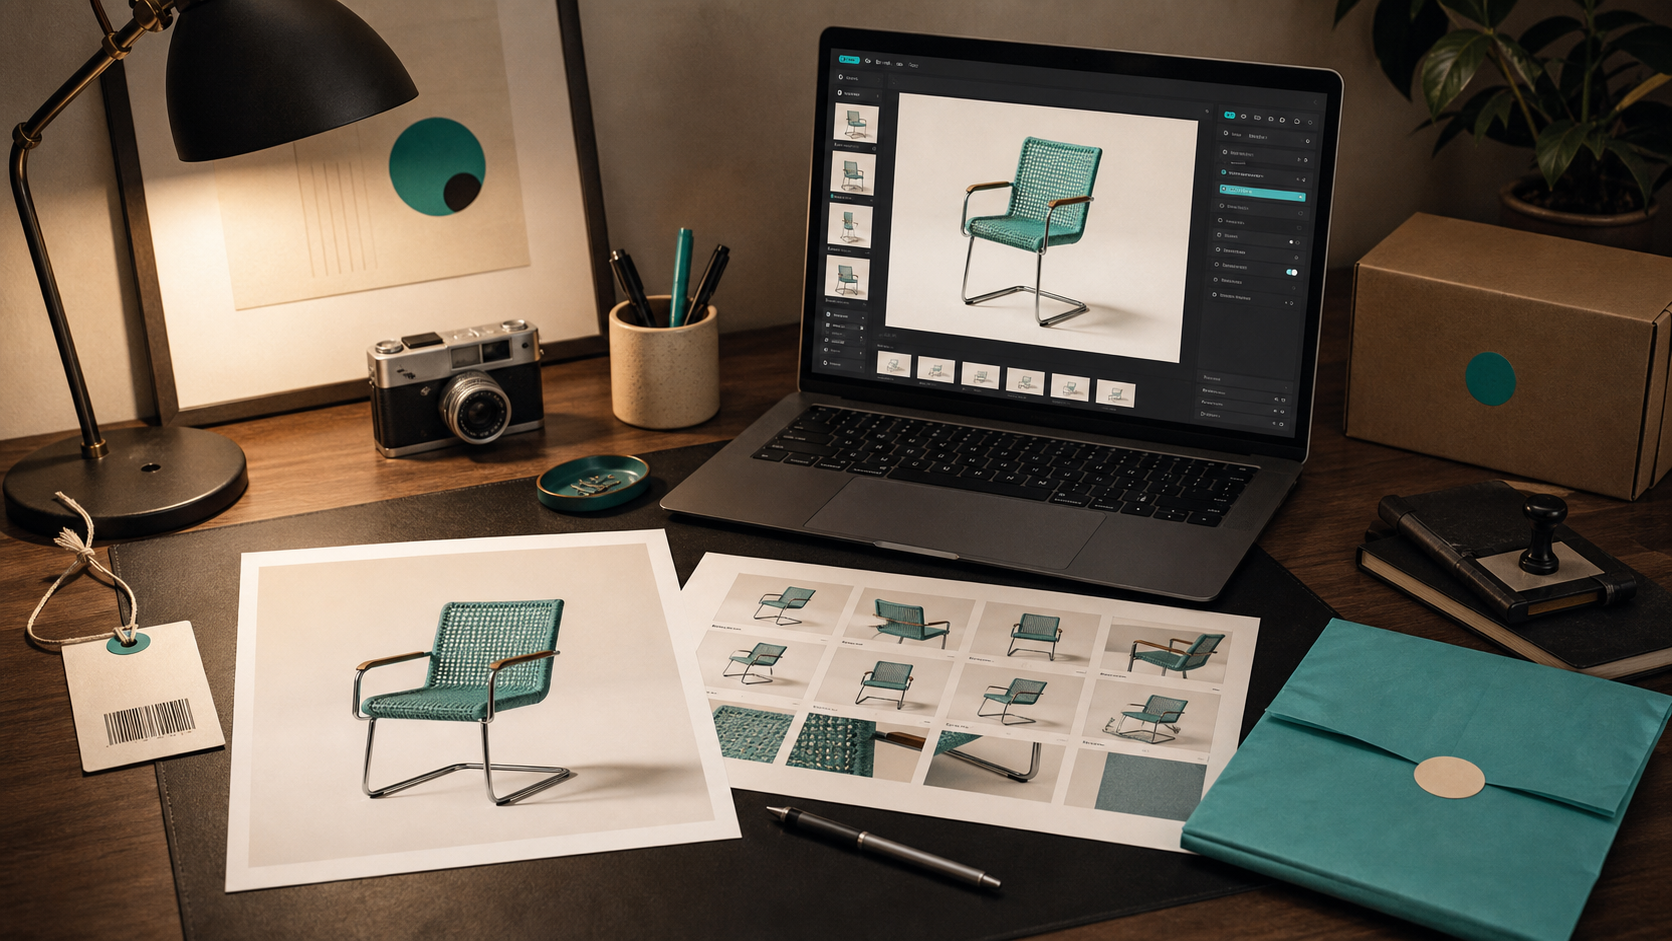
Supra AI Photo Studio is useful because it starts with the boring steps that keep later outputs from drifting: background removal, upscaling, auto enhance for denoise and deblur, and lighting or color correction. Once the source is clean, the rest of the workflow is much easier to trust.
The editor overview makes that flow obvious. The tools sit where I expect them, the canvas stays visible, and the image gallery keeps the source variants close at hand instead of hiding them in a separate upload flow.
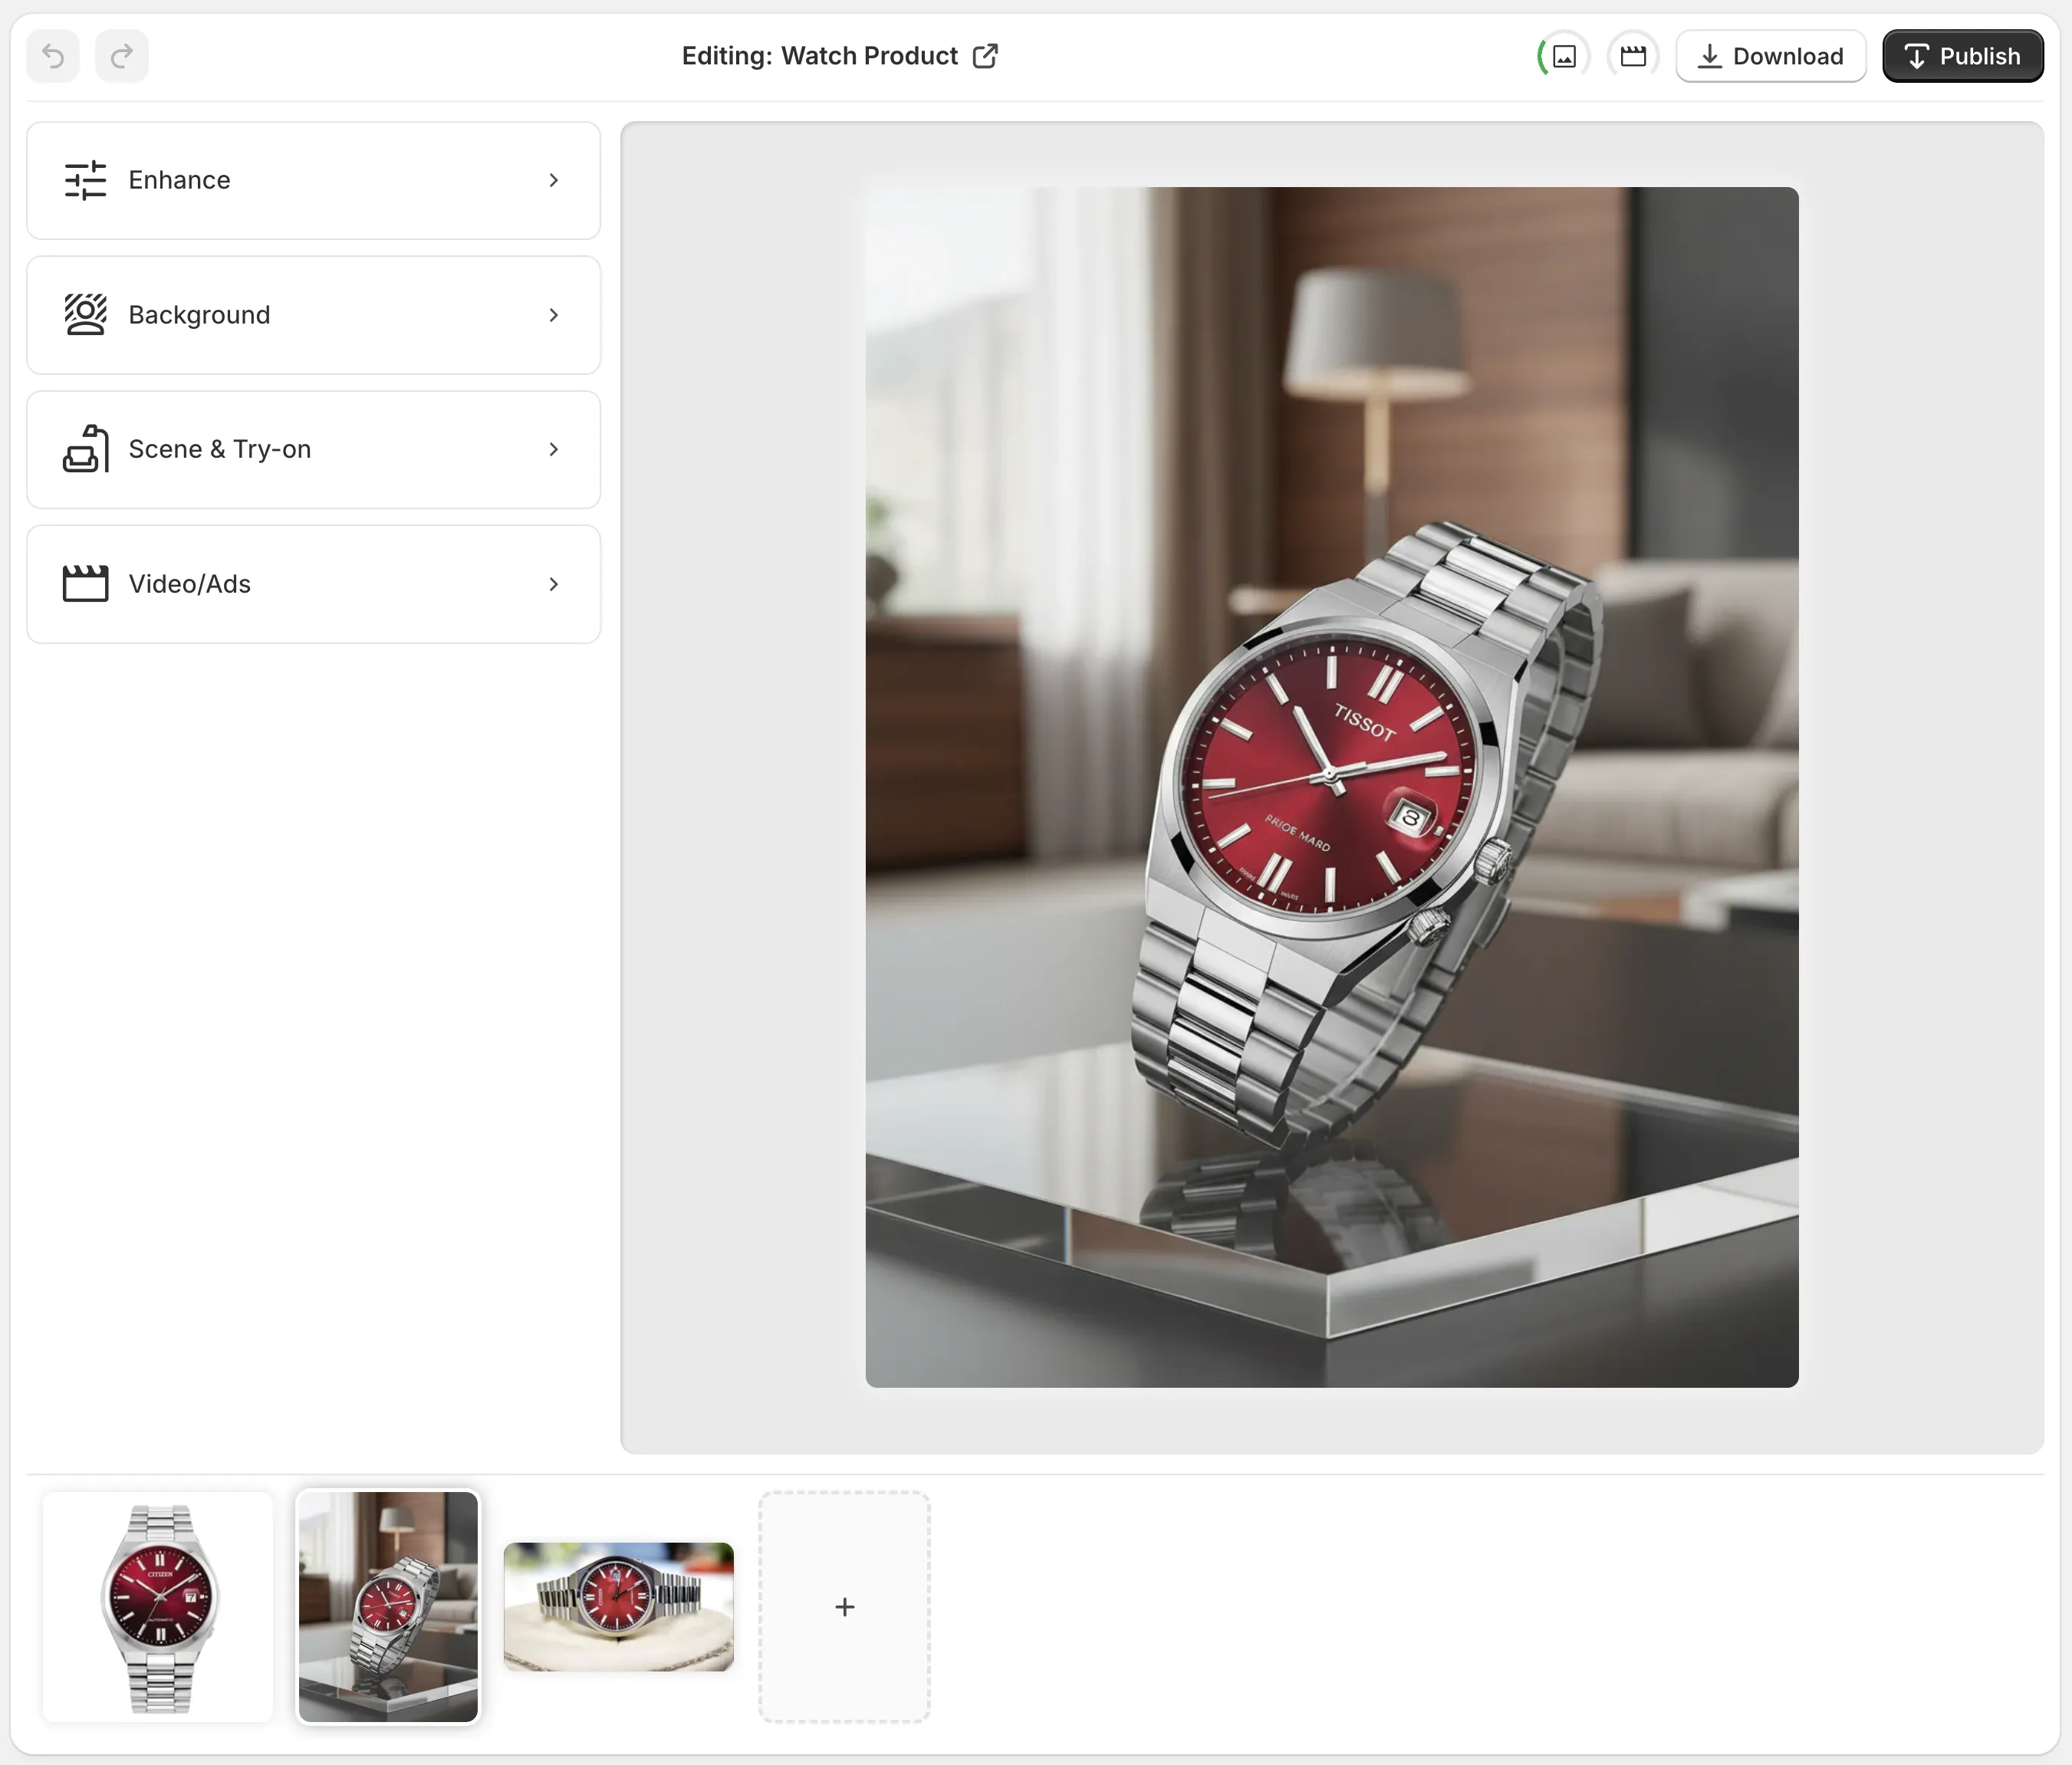
That matters because the workflow is not really about a single AI effect. It is about reducing the number of times I have to leave the asset and start over somewhere else.
Branch Into The Right Output
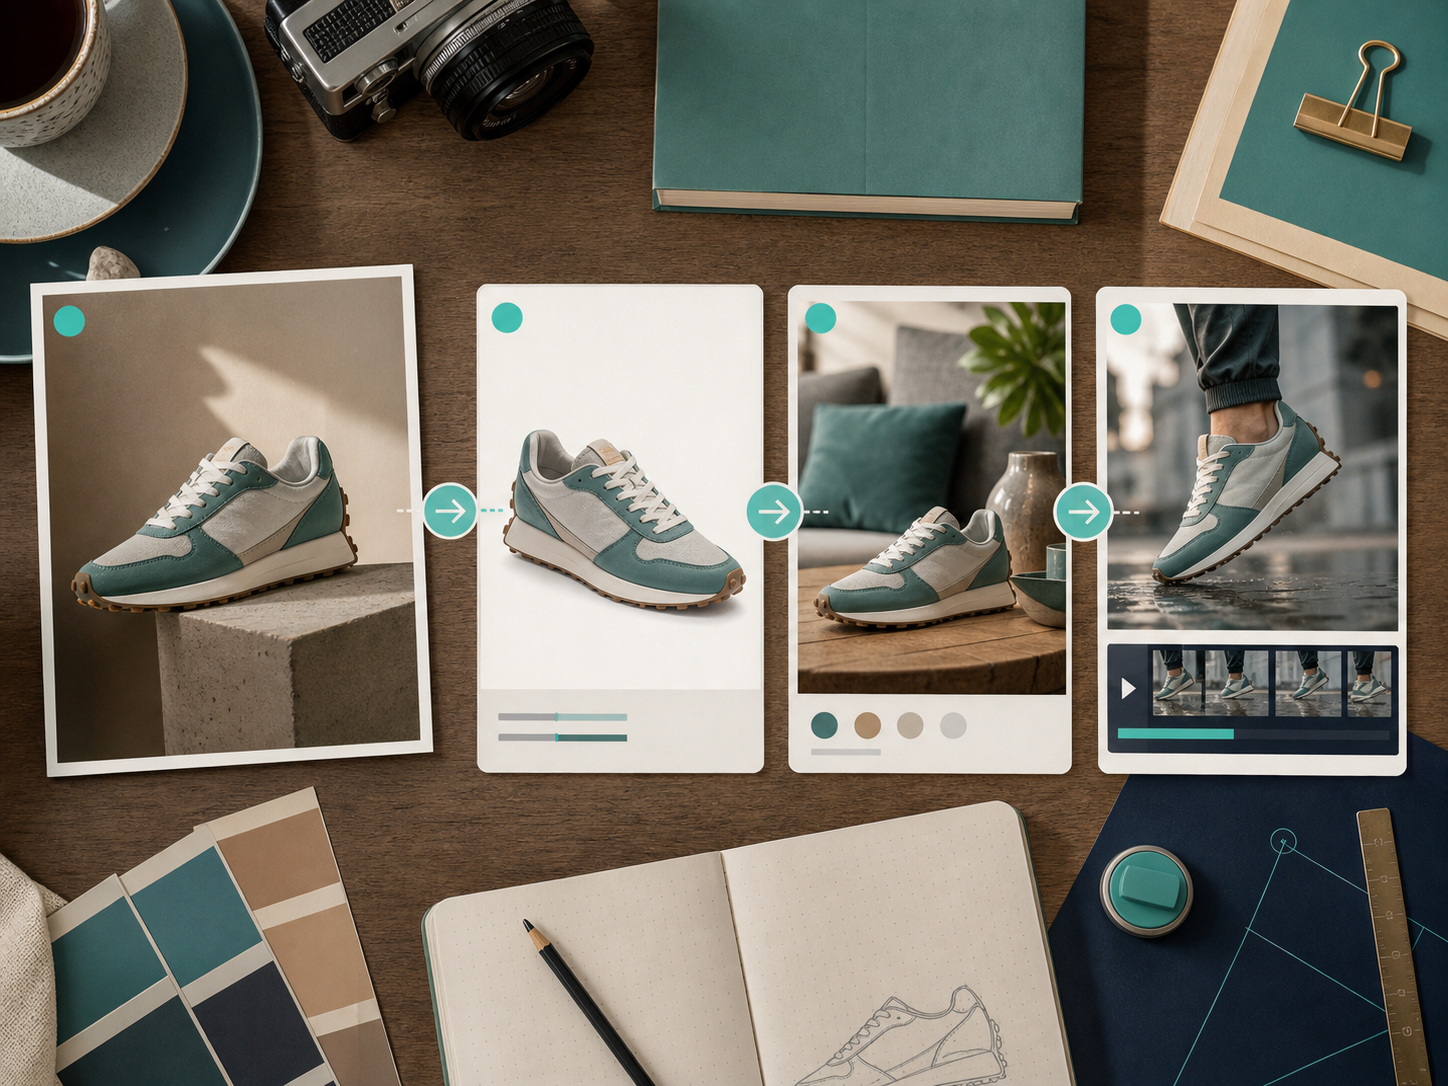
Once the source is clean, I care less about making one perfect image and more about producing the right image for the job.
If I am working on product pages, I want clarity first. If I am working on a collection page or a campaign, I want context. If I am working on fashion, I want try-on. If I am working on ads, I want motion.
Supra AI Photo Studio covers that path with object placement, AI try-on, mockup embedding, UGC videos, and b-roll videos. That is the useful part: the same source can become several kinds of evidence that the product is real, usable, and worth clicking.
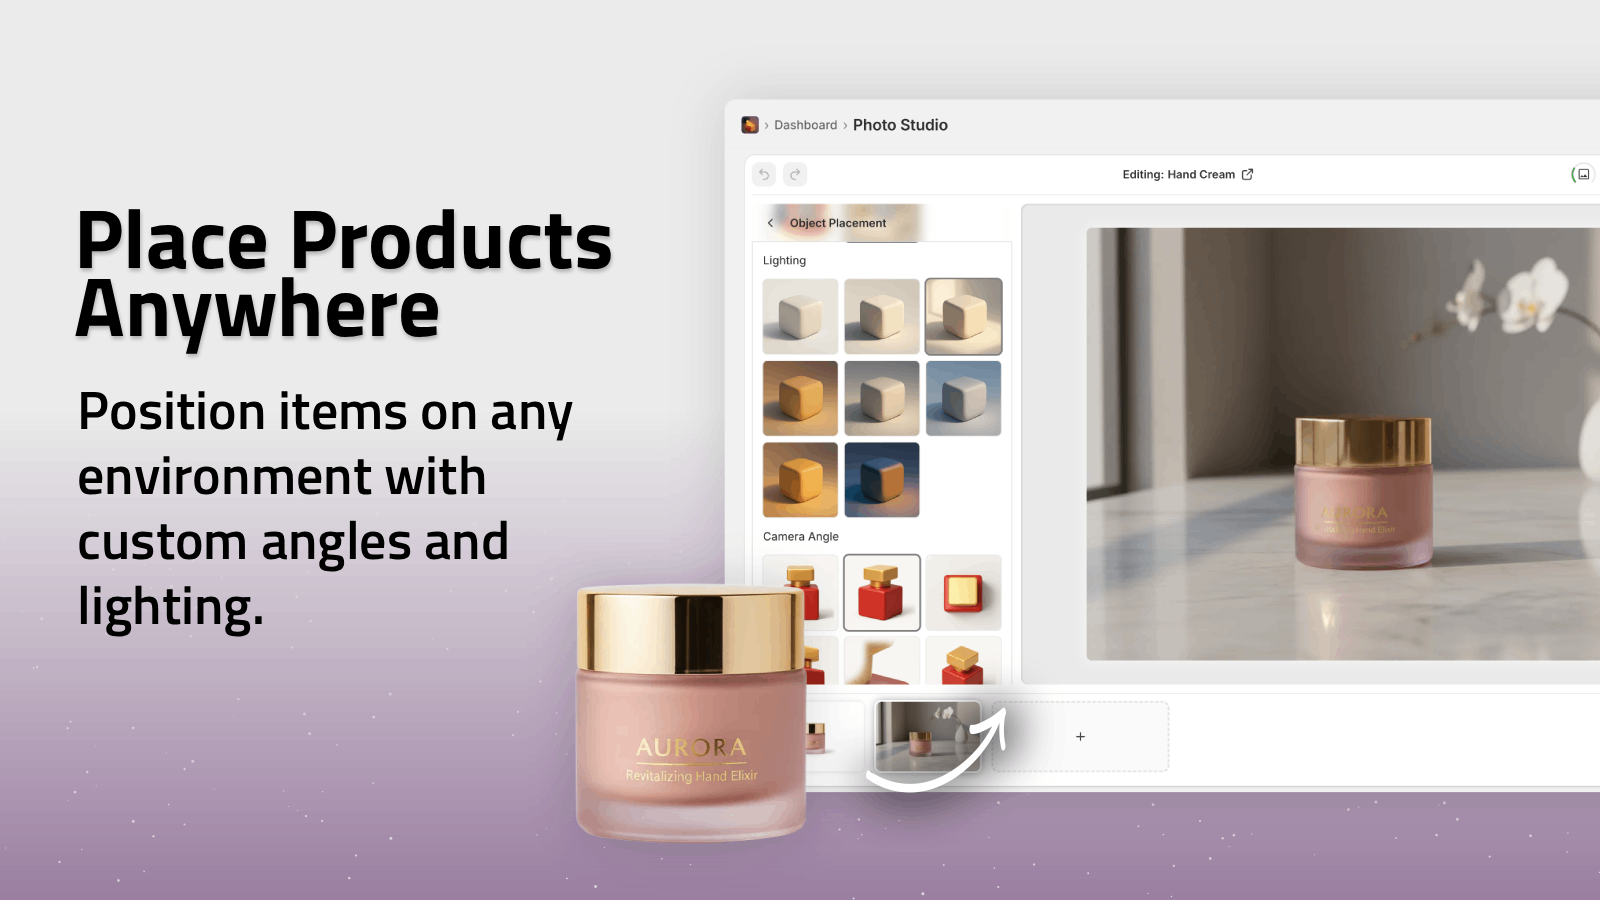
For non-fashion products, object placement is usually the fastest win. For apparel and accessories, try-on does the heavier lifting because it answers the “how does this look on a person?” question directly.
The Version I Keep Coming Back To
The most useful workflow is usually the least dramatic one.
I start with one source photo, run cleanup, then make three decisions:
- Do I need a clean catalog image?
- Do I need a contextual lifestyle version?
- Do I need a version that shows the product on a body or in motion?
That is the point where the product stops feeling like a photo editor and starts feeling like an asset pipeline. I am not trying to make every output identical. I am trying to make every output useful for a different stage of the customer journey.
What I Watch For Before I Use The Output
I do a quick sanity check before I call anything finished:
- The product still looks like the product.
- The colors still look close to the real item.
- The context helps the product, instead of distracting from it.
- The result matches the channel I plan to use it on.
If the source image is too blurry, too dark, or too messy, I do not expect the tool to save it. I use it to improve good input, not to invent detail that was never there.
That is also why I like seeing the whole workflow in one editor. It keeps the decision close to the asset instead of scattering the process across cleanup, composition, and export tools.
Where This Fits In The Rest Of The Stack
This is the same general idea I have been writing about in How to Create Studio-Quality Shopify Product Photos From Plain Shots, How to Turn One Product Photo Into Listings, Lifestyle Shots, and Ads, How I Turn Plain Product Photos Into Studio Shots, Try-Ons, and Ads, and How I Build a Shopify Visual System From One Product Photo.
The pattern is consistent: one photo is rarely the whole answer, but it is often enough to create the rest of the set if the workflow is structured.
The Part I Would Actually Ship First
If I were setting this up for a store tomorrow, I would not try to automate everything on day one.
I would pick one product, one clean source image, and one immediate goal: make the first output better than the original without making it look artificial. Then I would branch from there into the next use case, usually lifestyle or try-on, and only after that would I worry about video.
Supra AI Photo Studio is a good fit for that because it gives you a practical sequence instead of a one-click fantasy. It is also easy to test on a small scale because a free plan is available.
If your store already has decent product photos, the next move is simple: turn one of them into a more useful asset set and see how far the workflow can go before you need another shoot.