June 6, 2026
How I Turn Plain Product Photos Into Studio Shots, Try-Ons, and Ads
A practical Shopify workflow for turning one product photo into lifestyle scenes, model try-ons, and ad-ready visuals with Supra AI Photo Studio.

I kept seeing the same problem in Shopify stores: the product was good, but the photo stack was doing almost nothing for it. One white-background shot, one awkward crop, maybe one lifestyle image if someone had time. That leaves too much work for the customer’s imagination.
The fix I’ve been using is boring in the best possible way: start with one clean product photo, then turn it into a small set of visuals that serve different jobs. Supra AI Photo Studio is the tool I used to do that here. It gives me background removal, image enhancement, object placement, model try-ons, and AI video generation in one place, so I can move from source image to a usable asset set without bouncing across three tools.
If you want the product surface area, the app listing and the landing page are the two links I’d start with.

Start With A Clean Cutout
The first job is not “make it pretty.” It is “make it usable.” If the source photo still has a messy background, bad lighting, or weak contrast, everything downstream gets harder. I want a clean cutout first, because that makes object placement, try-ons, and video generation much easier to trust.
In practice, that means I start with background removal, then use the enhancement tools if the shot needs a little more polish. I’m not trying to invent detail that wasn’t there. I’m trying to remove the junk that prevents the product from reading clearly.
That’s the same reason I liked How to Keep Shopify Product Photos Consistent Across Your Catalog. If the catalog already has one consistent visual baseline, the AI output looks like part of the store instead of a random style experiment.
Turn One Photo Into A Lifestyle Scene
Once I have a clean product, I move it into a scene that helps the customer imagine ownership. For a lot of products, that means a desk, shelf, countertop, or studio setup. The goal is not a cinematic masterpiece. The goal is enough context that the photo feels finished.
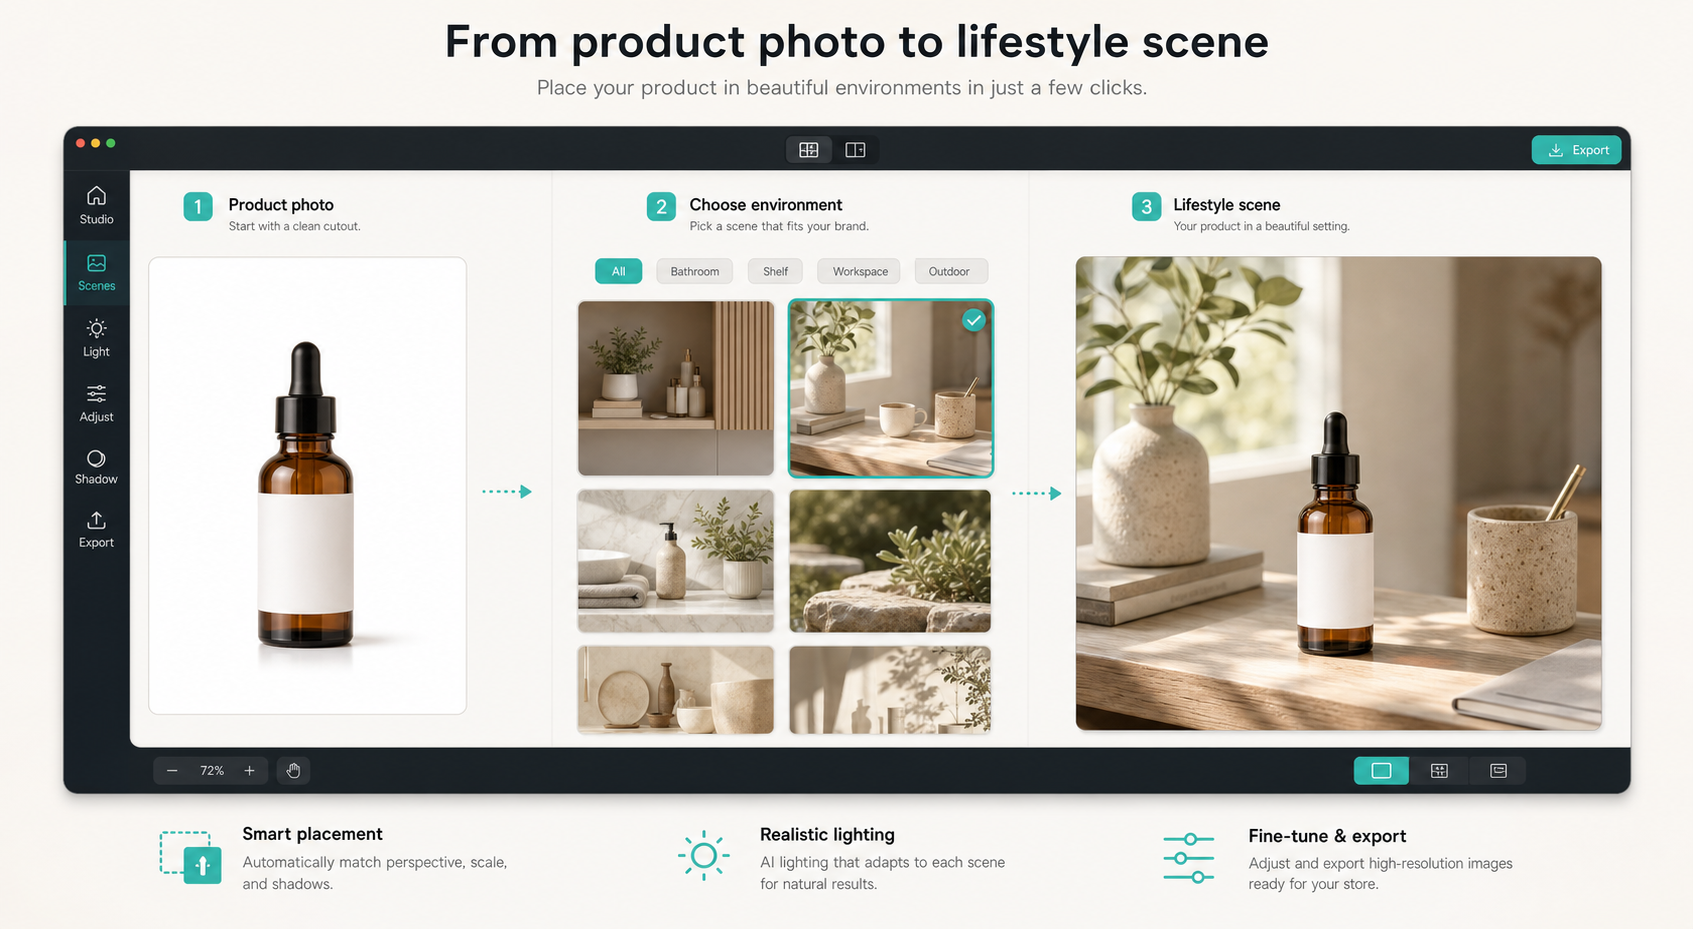
I like this step because it solves a common ecommerce problem without requiring a real photoshoot. If the product lives in a tidy scene, it suddenly looks like a real thing a real person would buy and use. That’s also why I kept linking back to How to Turn One Product Photo Into Studio-Ready Shopify Assets: the value is not just “more images,” it’s images that answer different questions.
The other thing I check here is scale. A product can look gorgeous and still be wrong if it feels too large, too tiny, or physically impossible in the scene. I treat the placement as a product decision, not just an image decision.
Use Try-On When The Product Needs A Human Frame
Some products need a person to make sense. Apparel, accessories, jewelry, and similar items usually convert better when the customer can see the item on a model or at least in a human context. That is where the try-on side matters.
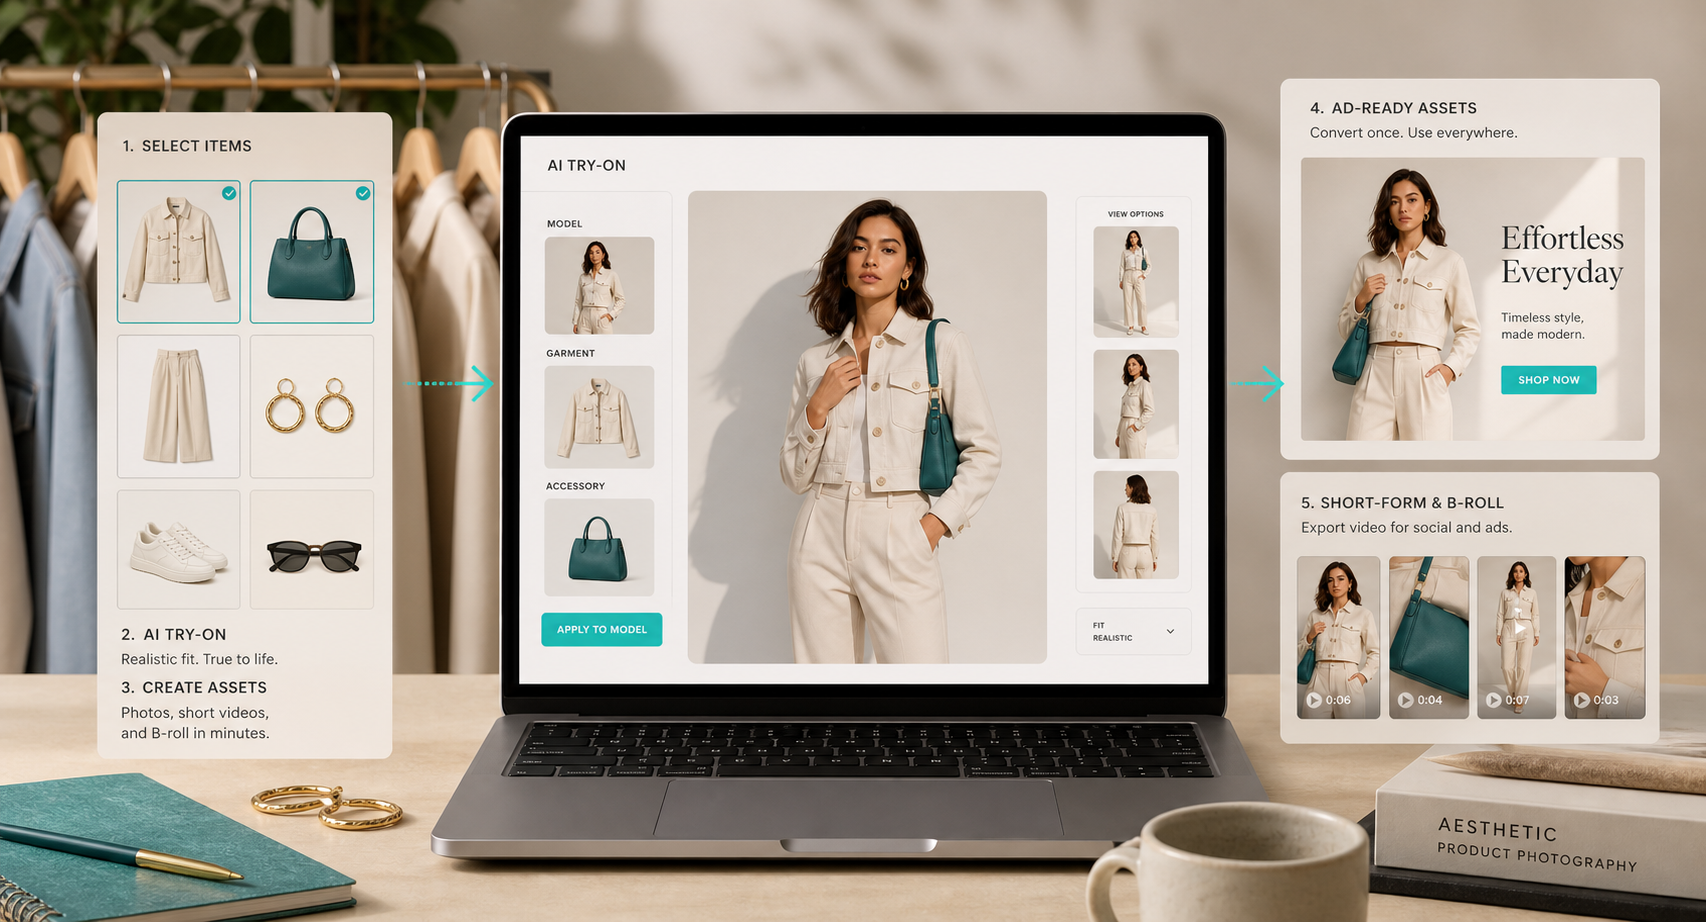
This is the part where Supra AI Photo Studio gets useful for more than catalog work. You can create model-based visuals without hiring a new shoot every time you want a different look. If that sounds familiar, How I Turned Plain Shopify Product Photos Into a Full Launch Kit shows the broader asset set, and How I Turn Notion Drafts Into Webflow CMS Posts With SyncFlow is the version I’d send to someone who cares a lot about turning one source into many outputs.
My rule here is simple: if the product needs a body, give it a believable body. If it doesn’t, don’t force one. The best output is the one that makes the product easier to evaluate, not the one that looks the most dramatic.
Turn The Same Asset Into Ads And B-Roll
Once I have a good still image set, I want one more thing from the same source material: motion. Even a short product clip changes how useful the asset set is because it can serve ads, social, and landing-page refreshes without a separate production cycle.

This is also where the workflow starts to feel like a system instead of a one-off editing session. I can take one source image, generate a few scene variants, then make short-form video or b-roll from the same base concept. That’s the workflow I wanted when I wrote How to Create UGC-Style Product Videos for Shopify Without Hiring Influencers, because the product page, the ad creative, and the social clip should not feel like separate marketing departments.
If the visual stack is coherent, I don’t need to reinvent the story for every channel. I just resize the output to the channel that needs it.
The Workflow I’d Actually Ship
If I were turning this into a repeatable process for a store, I’d keep it small:
- Start with one clean product photo.
- Remove the background and fix obvious exposure problems.
- Generate one lifestyle scene and one human-context version.
- Review scale, lighting, and product accuracy before publishing.
- Export one short video or b-roll clip from the same asset set.
That’s enough to get a useful set of assets without turning the workflow into a science project. It also keeps the review step where it matters. I’m happy to automate the repetitive edits, but I still want a human to decide whether the product reads correctly and whether the scene matches the brand.
If you want more context on the way I think about that review step, How to Turn One Product Photo Into Studio-Ready Shopify Assets is still the best companion piece, and How I Built a Draft-First Shopify Blog System for Ecommerce SEO shows how I keep the final look from drifting into generic AI output.
Bottom Line
I don’t want product photography to be a special project that only happens when the budget is big enough. I want it to be part of the store’s normal operating workflow: clean the source image, place it in a scene, try it on if needed, and turn the same asset set into ads or video when that helps.
That’s the part Supra AI Photo Studio gets right for me. It keeps the work inside one admin flow, and it makes the next visual version easier to produce than the last one.
If you want to try the same approach, start with a single product photo on the landing page and build one lifestyle scene before you do anything more ambitious.