
July 8, 2026
How to Build a Shopify Product Photo Workflow Without a New Shoot
Turn one usable product photo into cleaner images, lifestyle scenes, try-ons, and ad clips with Supra AI Photo Studio.
How to Build a Shopify Product Photo Workflow Without a New Shoot
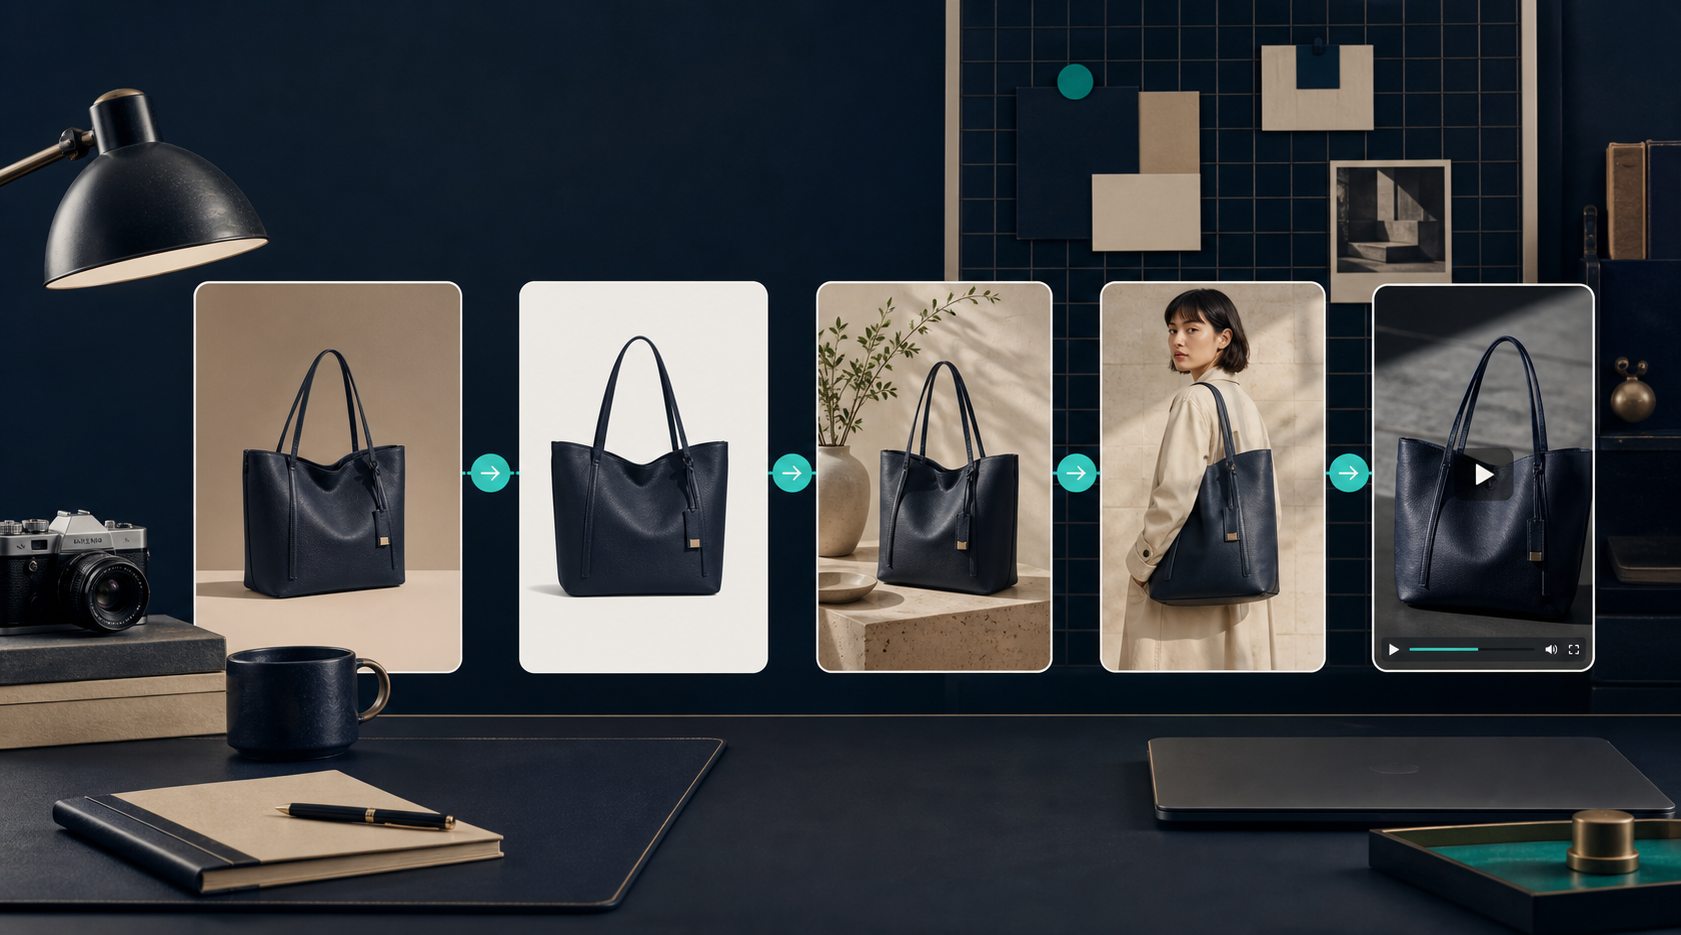
If you already have one usable product photo, you do not need a full reshoot to get more Shopify assets. Supra AI Photo Studio can turn that source file into cleaner catalog images, lifestyle scenes, model try-ons, mockups, and short videos.
I use this kind of workflow when I want more useful visuals fast, but I still want a human review step before anything ships. The point is not to publish blindly. The point is to turn one decent input into a small, consistent asset set.
What you will build:
- A cleaner hero image for product pages
- At least one lifestyle version for context
- A try-on, placement, or mockup variant when the product calls for it
- A short motion asset for ads or social
1. Start With the Best Source Image You Have
The workflow works best when the starting point is already honest and sharp. Pick the image that shows the product clearly, even if it is not pretty yet.
Look for:
- Clean edges
- Enough resolution to crop without falling apart
- Lighting that shows the real shape and color
- A product angle you would actually use on a product page
If the source image is blurry or badly lit, fix that before you try to stylize it. A weak input tends to produce weak outputs, no matter how good the tool is.
2. Clean the File Before You Stylize It
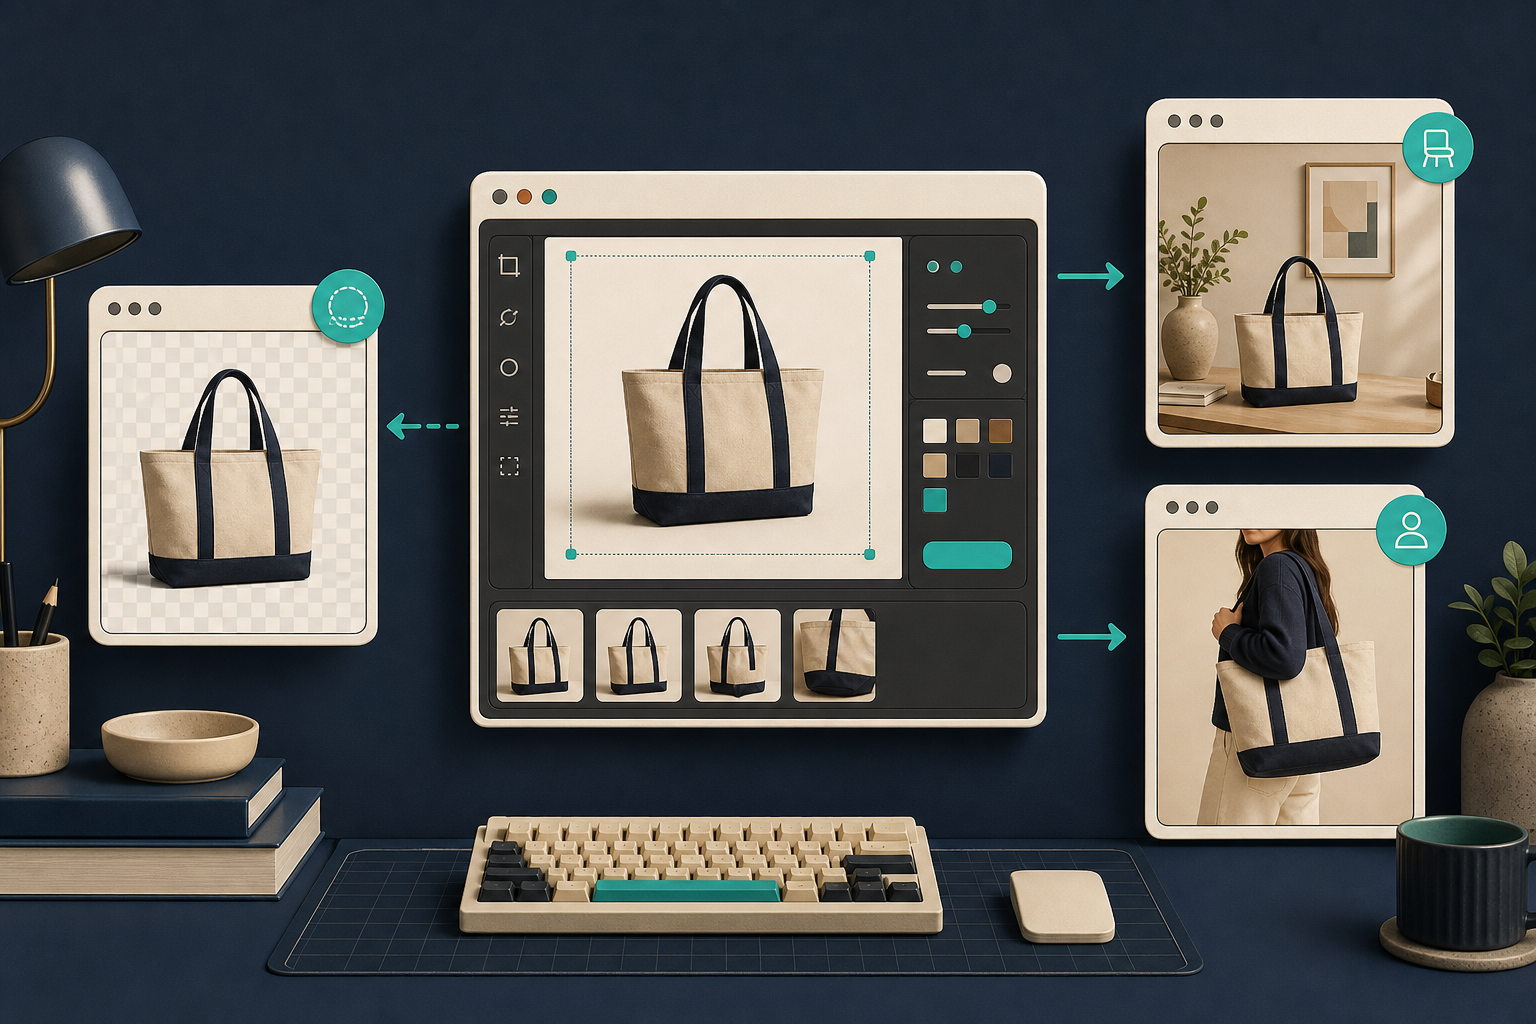
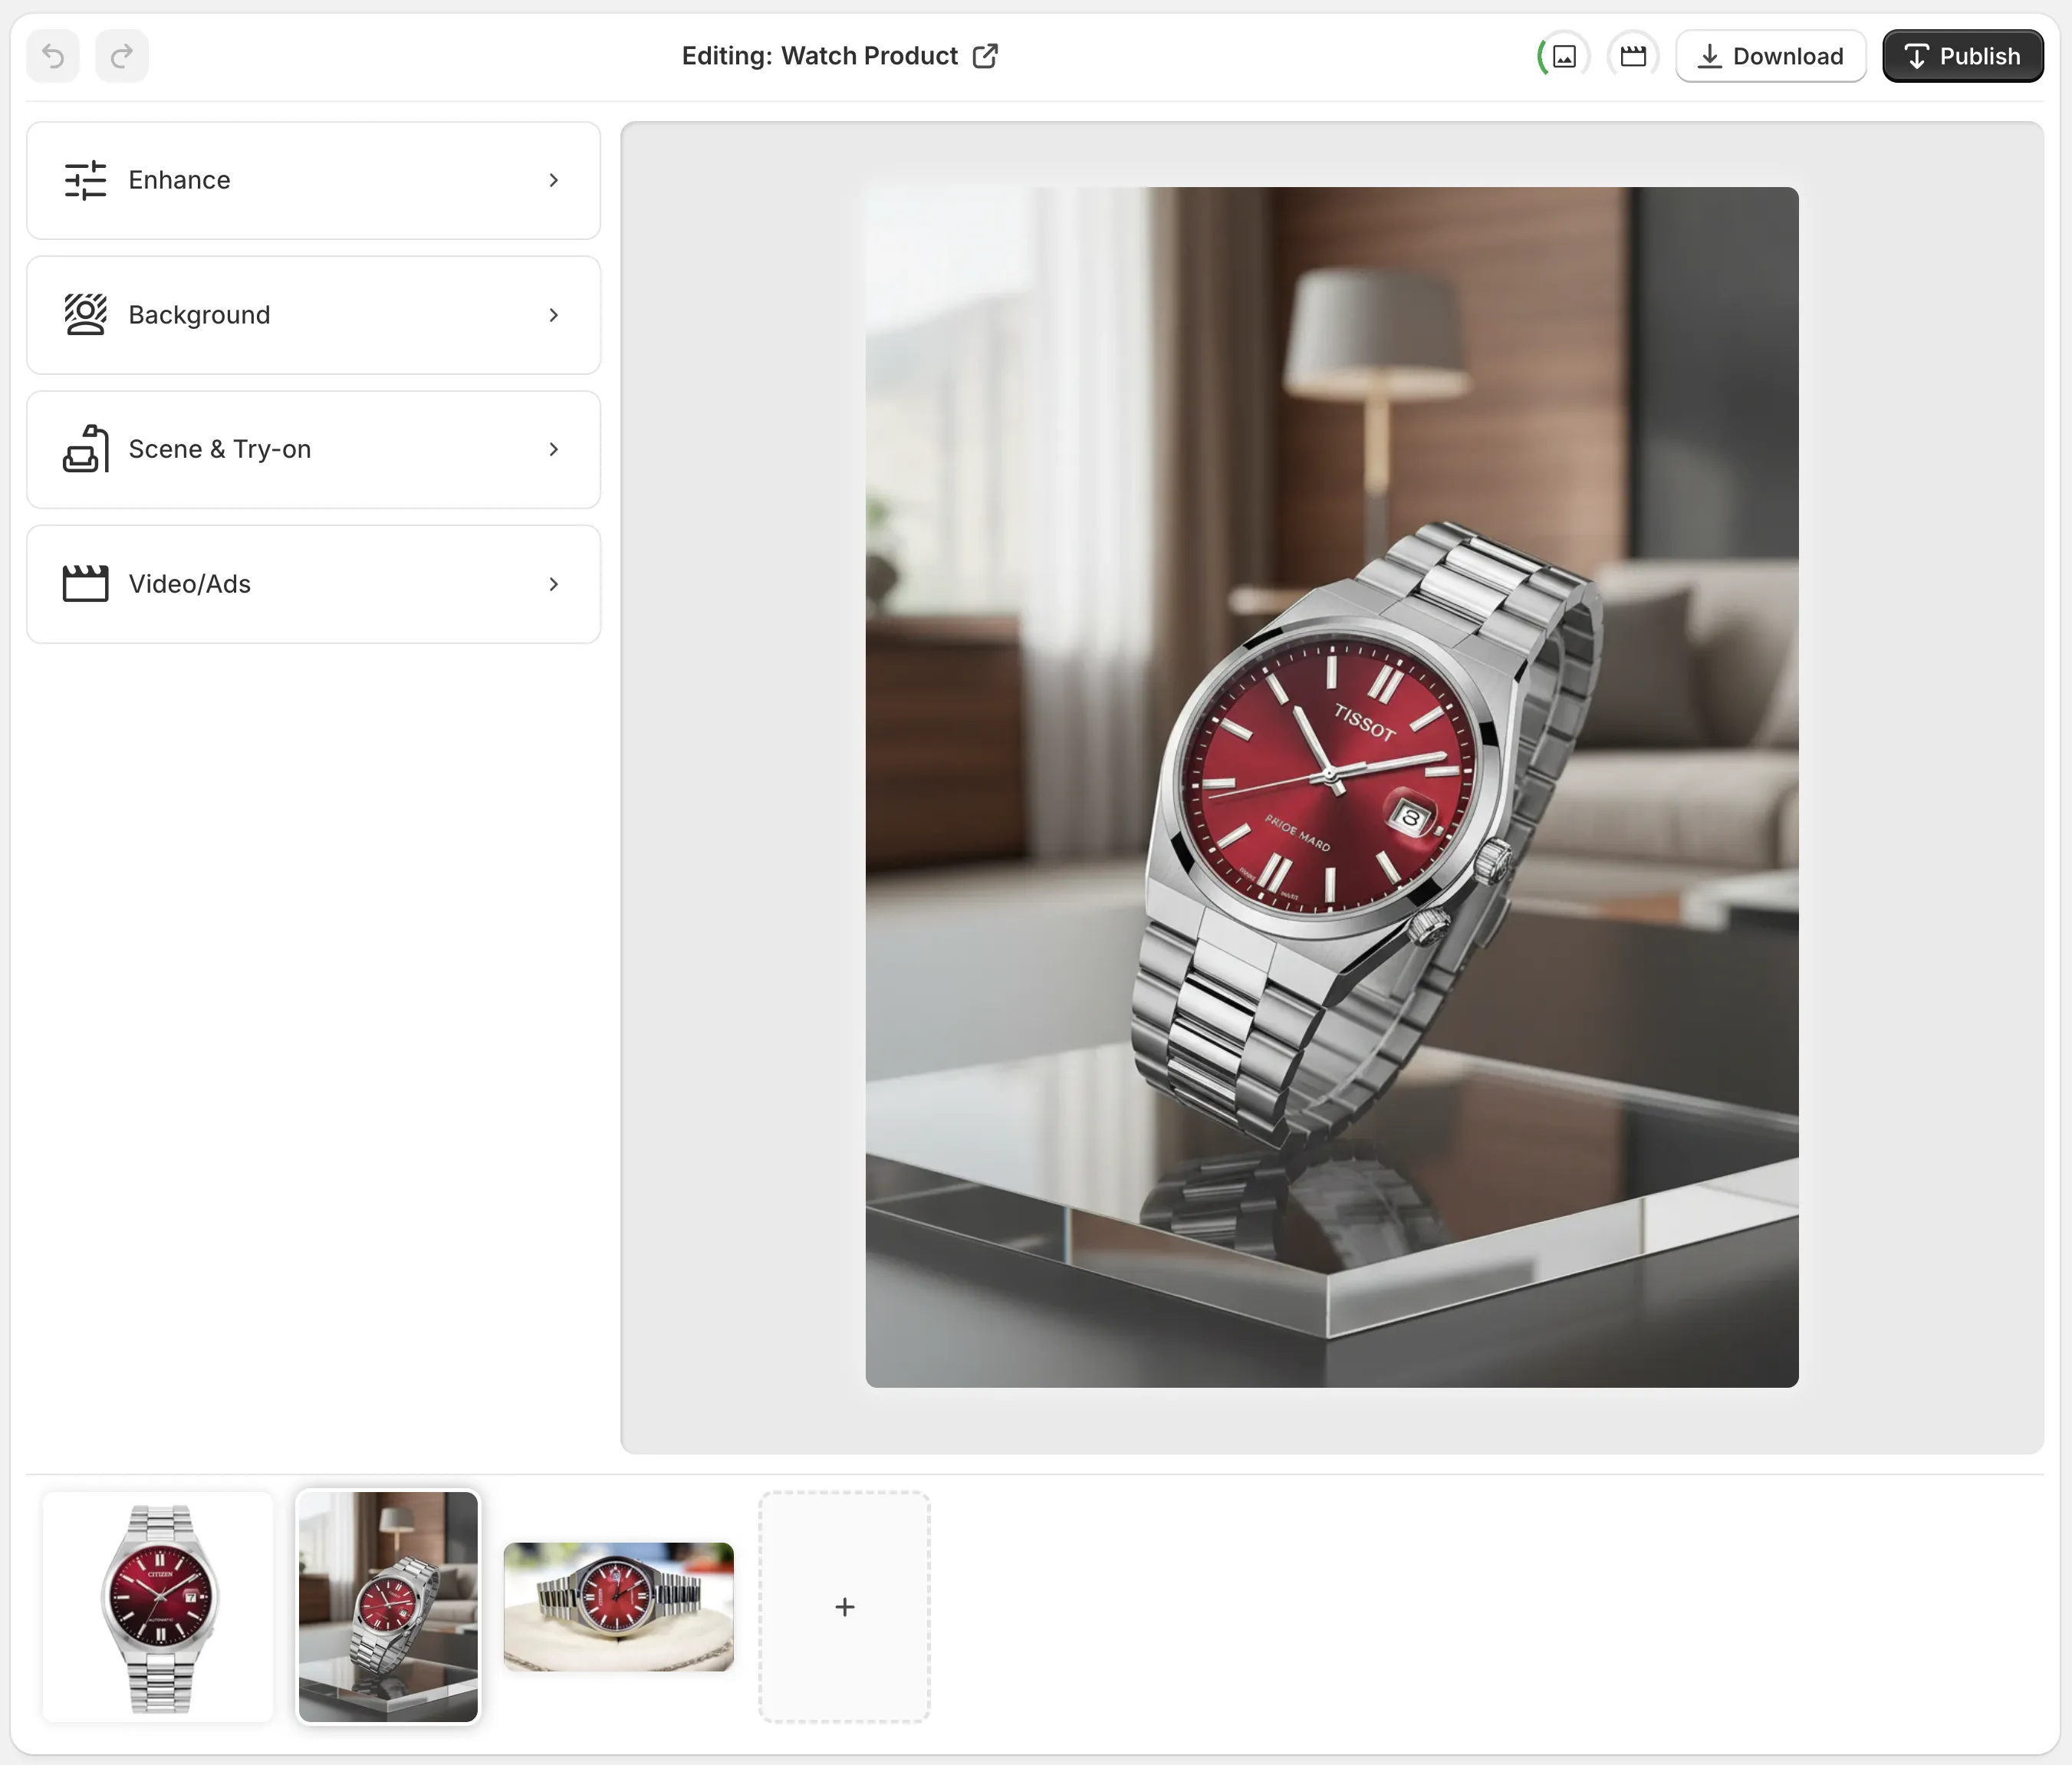
This is the part that removes the obvious problems first. In Supra AI Photo Studio, I would start with background removal, then use the enhancement tools to sharpen the file and correct the light if needed.
The order matters:
- Remove distractions.
- Improve clarity.
- Keep only the product details that help the customer make a decision.
That sequence is usually better than jumping straight to a fancy scene. If the product still looks muddy after cleanup, you will feel it in every downstream variant.
3. Pick the Output Based on the Channel
Different channels need different kinds of proof.
- Product pages usually need a clean hero image plus one contextual image.
- Collection pages usually benefit from simpler, more uniform visuals.
- Ads and social often need motion or a stronger lifestyle cue.
- Apparel needs a fit or try-on view more often than a pure product cutout.
- Merch and printed goods may need a mockup instead of a scene.
The cleanest rule I know is this:
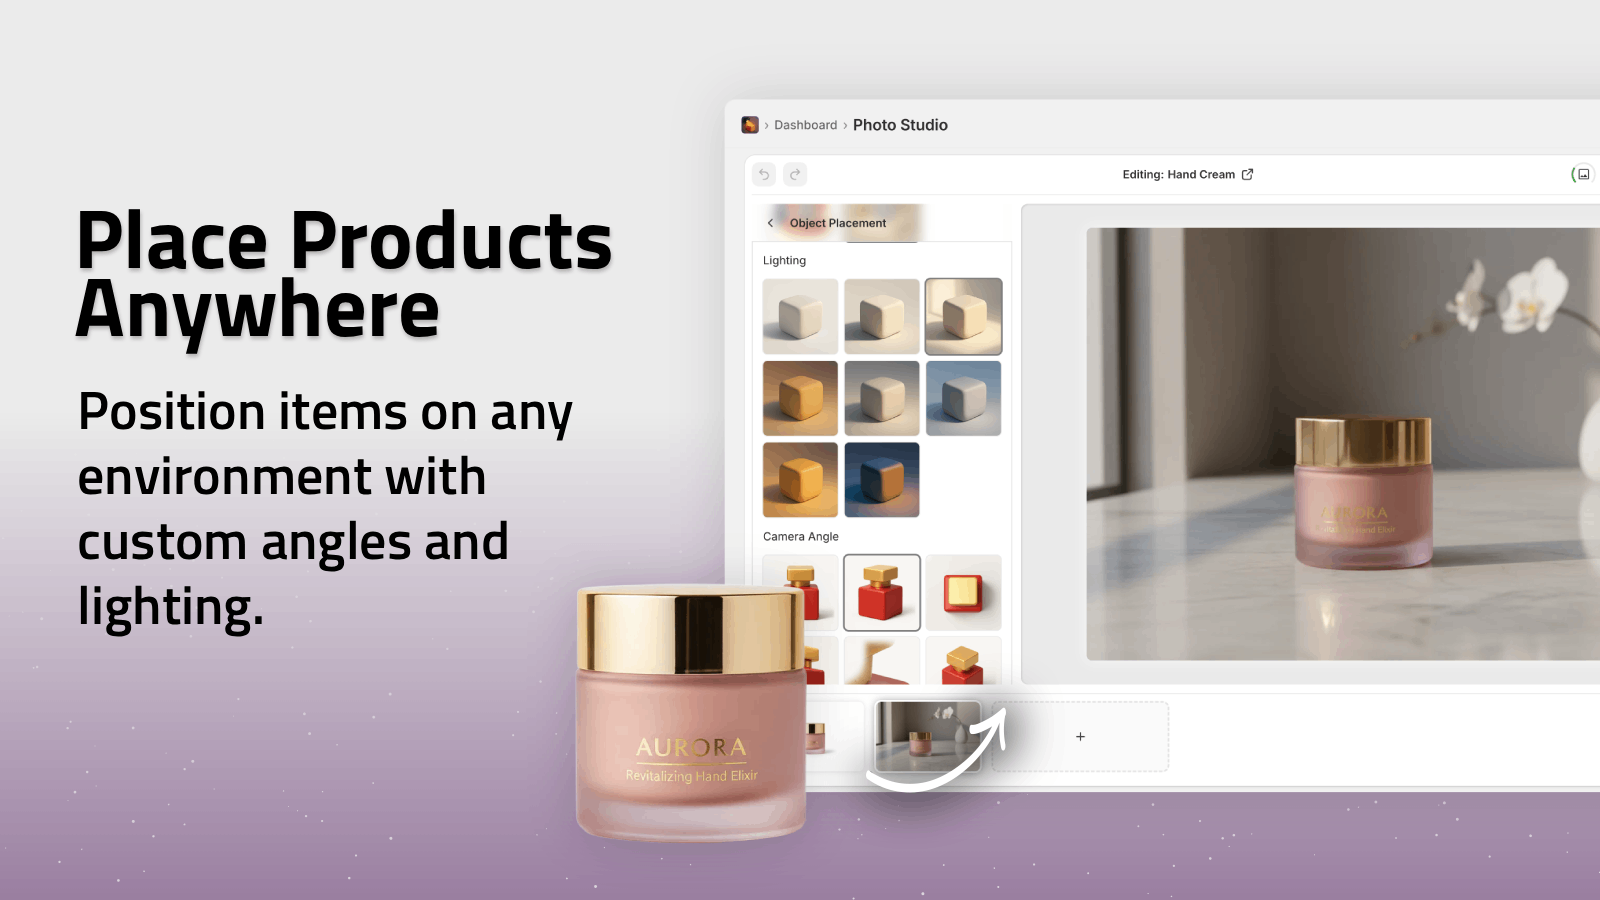
- If the scene is the message, use object placement.
- If fit is the message, use try-on.
- If motion is the message, use b-roll or UGC-style video.
- If the design is the message, use mockup embedding.
That keeps the output matched to the job instead of forcing one format to do everything.
4. Build a Small Variant Set, Not One Perfect Hero Shot
One good photo is rarely enough for a store with more than a few SKUs. What you want is a small set of versions that still feel like the same product family.
A practical set looks like this:
- A clean cutout or enhanced product photo.
- A lifestyle scene with the same product treated consistently.
- A close-up crop or alternate composition for the mobile experience.
- A motion version for the ad or social channel.
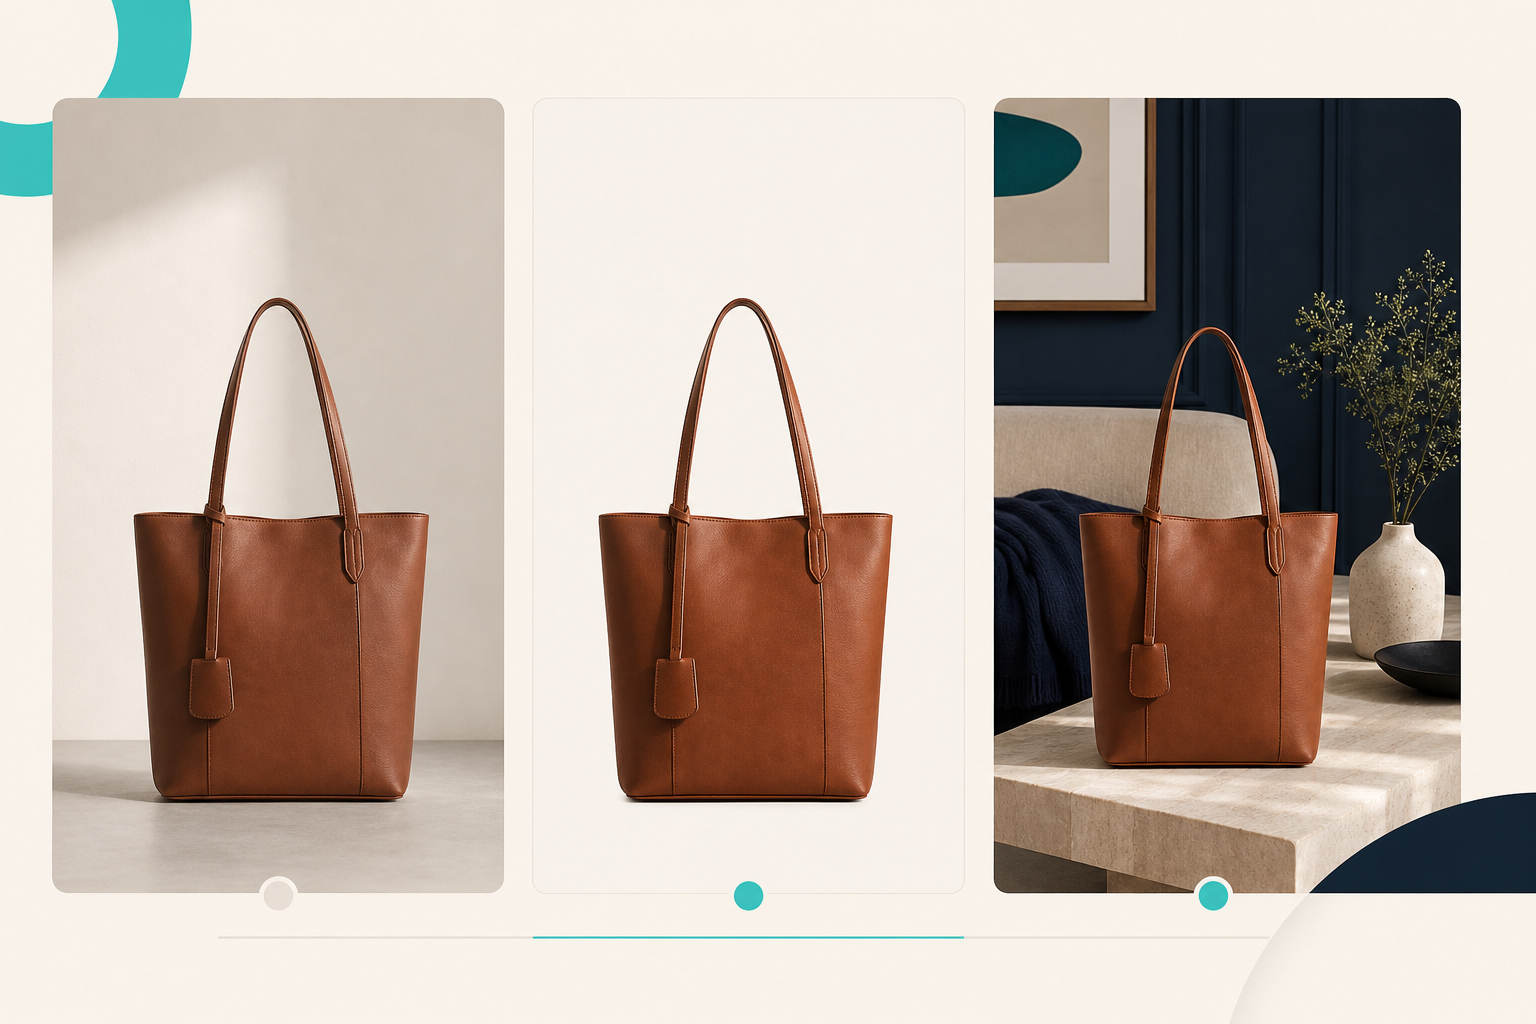
If you want related examples of this same idea, I also wrote about turning a plain product shot into Shopify ads and try-ons, turning plain Shopify product photos into lifestyle shots, building a Shopify visual kit from one product photo, and turning plain product photos into high-converting Shopify visuals.
The value is consistency. If a customer sees three versions of the same item across a product page, a collection page, and an ad, the visuals should feel related instead of randomly generated.
5. Make the Scene Believable
The fastest way to make AI-generated product imagery feel cheap is to overdo the styling. The product should still be the subject.
Use scene details that support the item:
- Furniture, props, or textures that fit the product category
- Lighting that matches the mood of the store
- Camera angles that keep the product readable
- Backgrounds that stay simple enough for ecommerce
For example, a bag or accessory should usually feel like it belongs in a real environment, not a fantasy render. A fashion item should keep body shape, drape, and proportions believable. A home item should feel placed, not pasted.
That is where the app’s object placement and try-on options are useful. They let you move from plain packshot to contextual image without making the result look like a random collage.
6. Add Motion Only After the Still Images Work
I would not start with video. I would start with the stills, because the stills tell you whether the product details are intact.
Once the image set looks right, use motion for the channels that need it. Supra AI Photo Studio supports UGC videos and b-roll style clips, which is useful when the same product needs to show up in an ad, a reel, or a social test.
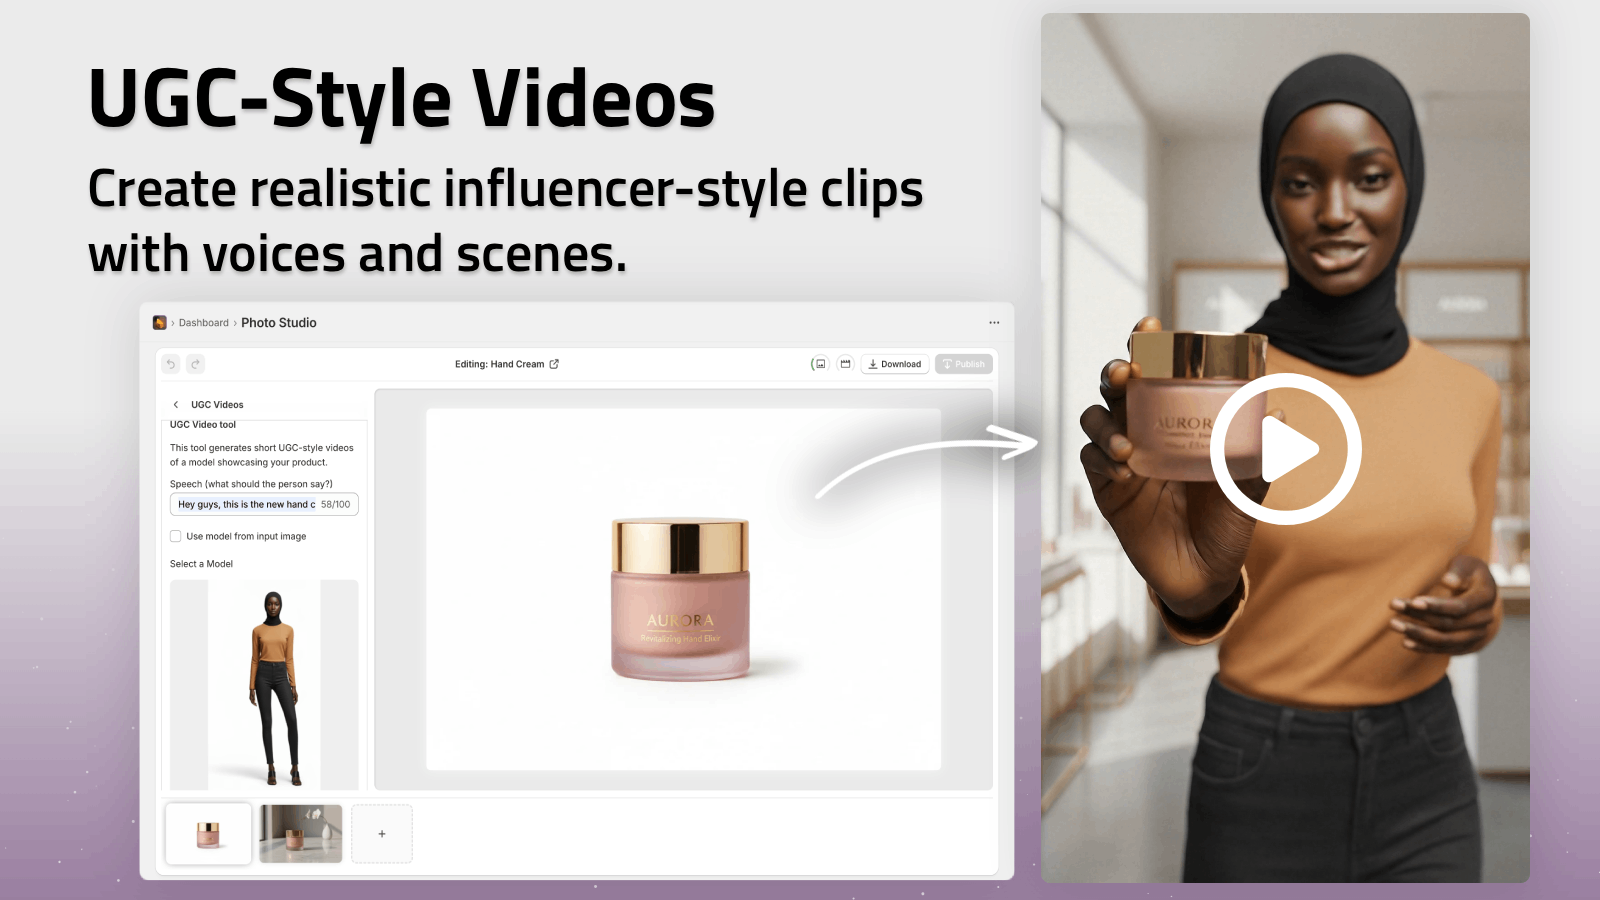
Keep the motion brief and focused:
- Show the product quickly.
- Do not hide the actual item behind heavy effects.
- Keep camera movement simple.
- Make sure the clip still matches the store’s brand tone.
If the still frame is wrong, the video will not save it. It will only make the mistake more expensive.
7. Review for Accuracy Before You Publish
This is the step that prevents the workflow from becoming generic AI content.
Check:
- The product shape is accurate.
- Color is still believable.
- Logos or key details are not distorted.
- The scene matches the store’s positioning.
- The image set feels coherent across the catalog.
That review step matters even more when you are using try-ons or mockups, because a visual that looks cool but misrepresents the product will cost more later in support and returns.
When This Workflow Is Worth It
I reach for this workflow when:
- I have one solid product image but no time for a shoot
- A launch needs several visuals in a hurry
- The catalog needs consistency across listings
- Ads need more than one creative angle
- The team wants faster output, but not zero review
Supra AI Photo Studio is a good fit when you want AI help with the visual workload, but still want to decide what gets published. It offers a free plan, so you can test the workflow on one product before you commit to a larger run.
If you want the app details, start with the landing page or the Shopify App Store listing. If you want to see the editor in motion, watch the demo trailer.
The short version is simple: clean the source file, choose the right output for the channel, keep the variants consistent, and review the result before it goes live.
The next step is to try that process on one product and see how many usable assets you get from the same starting photo.